• Home
  • Tags
  • RSS
  • ME!
  • Edit

Thursday, March 26, 2009

6 steps for a pillow

Image:Applique flying tree pillow.jpg

When many people think of sewing things, they often believe that they need a pattern. However, when you are sewing a basic pillow, there is no need for one (because it is extremely simple). This article will show you how to make a basic square or rectangular pillow.

test

Steps

  1. Decide how big your pillow is going to be. If you are going to use stuffing, it can be any size you want. But for our project the dimensions will be ______inches square.
  2. After double checking on the measurements, add a half inch to each side to allow for a quarter-inch seam on all four sides. This means you will add 1 inch to the size of the pillow.
  3. Mark your measurements, and then cut the fabric to size.
  4. Put the right sides of the fabric together. Pin the fabric together around the edges with pins pointing to the center.
  5. Sew around the edges with a half-inch (width of the presser foot) seam allowance, leave your opening in the middle of one side. Leaving a large enough opening to insert stuffing. To reinforce the seams, zig zag around the edges, especially if you are sewing smaller seams.
  6. Turn your fabric right-side out and insert stuffing. Turn the edges of the opening under slightly and sew it together using a whip-stitch. Make sure that the thread matches the fabric so it blends in and is not seen. You now have a beautiful pillow.
Tips:

  • Measure twice, cut once!
  • Cotton fabric is best if you are a beginner.
  • Look online and in sewing books for ideas on how to use ribbon, buttons, and piping in your pillows.
2008-05-21-Onesie Pillow2

BunnyPillow.jpg


Read more...

Thursday, March 19, 2009

Hand-made from friend

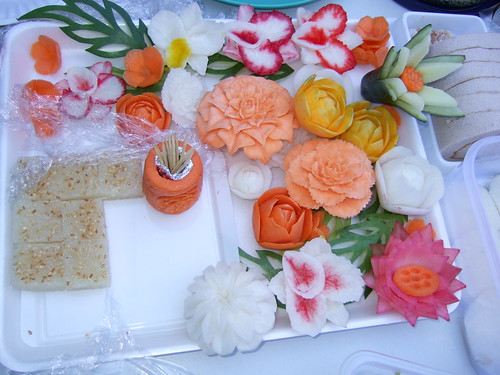
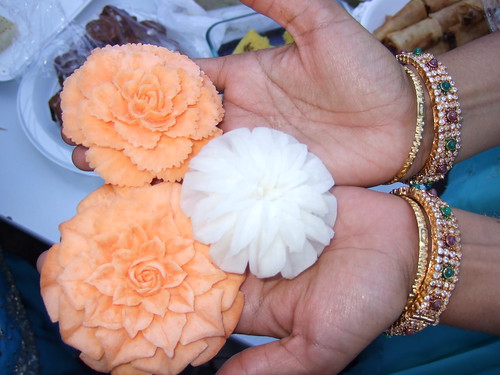
My friend did these, they are really cute. She is so talented and I want to learn these things from her.

Look at these flowers which are from carrots, sweet potatoes, onions and other kinds of vegetables.

DSCF1240 by you.

DSCF1239 by you.

The lady in pink did it.

DSCF1228 by you.


Read more...
Friday, March 13, 2009

Origami Boat

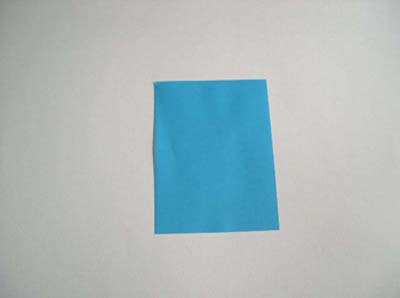
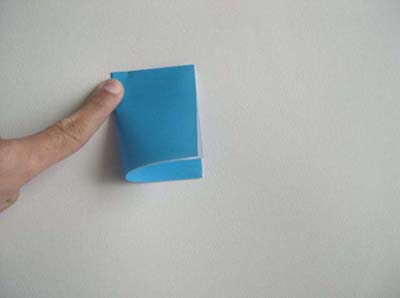
Begin with a rectangular piece of paper.

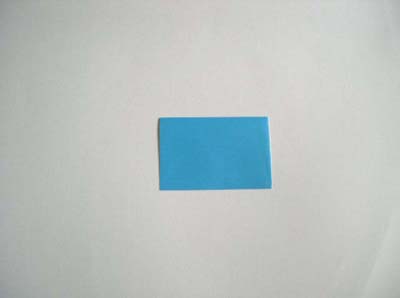
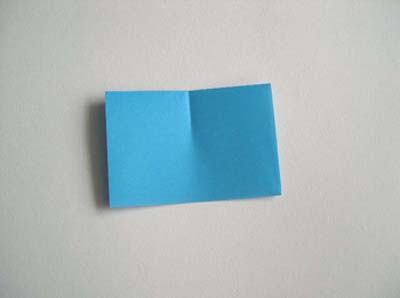
Fold it in half as shown. Then partially fold it again, making a crease near the top:

ready to make origami boat

origami-boat folded rectangle

origami-boat-creased rectangle

Here you can see the crease in the photo below left. This helps you line up the corners which you fold down as shown below:

origami-boat-crease mark

origami-boat-corners folded

origami-boat-corners creased

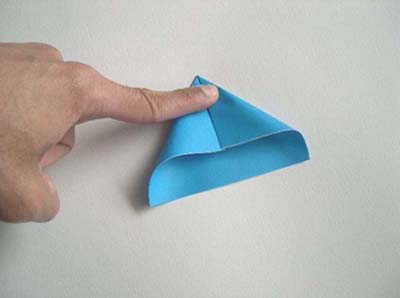
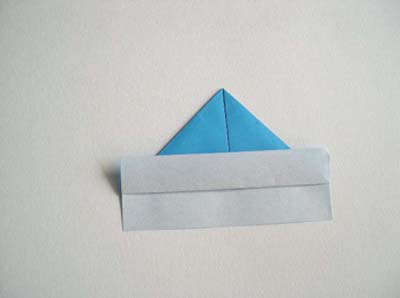
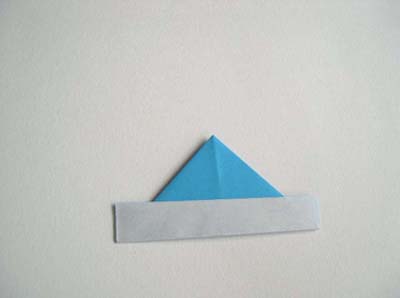
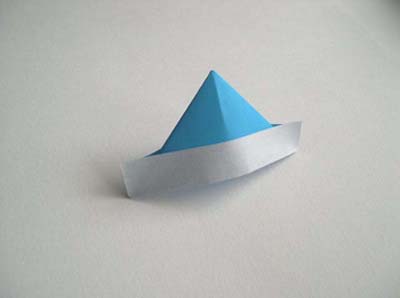
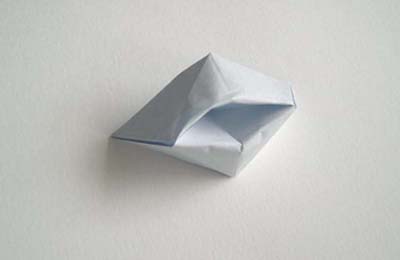
Now fold each edge of the paper upwards as shown. Use your fingers to open up into a hat! You can stop at the hat, or continue on to the boat.

hat taking shape

looks like origami hat

origami hat!


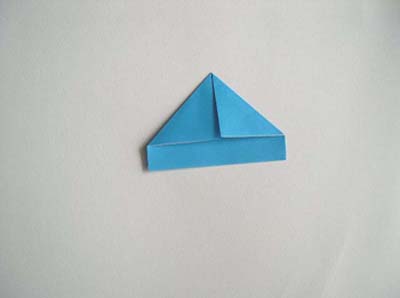
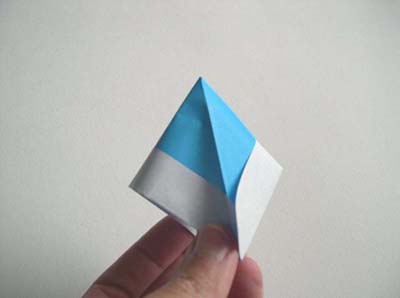
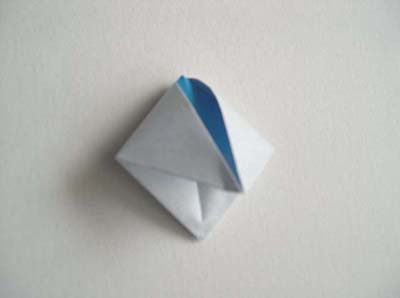
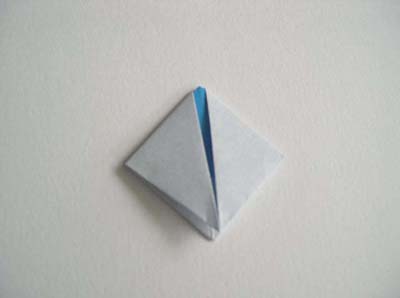
Bring the corners of the hat brim towards each other. The edges of the brim will be pushed outwards. It's kind of like you're "squashing" the hat into a square:

turning the hat into an origami boat

origami-boat-squash folding the hat

hat squashed

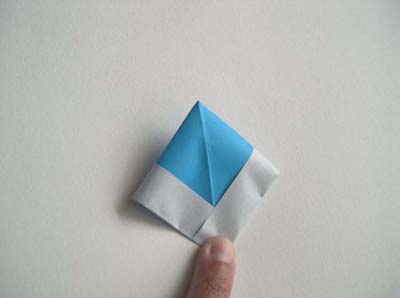
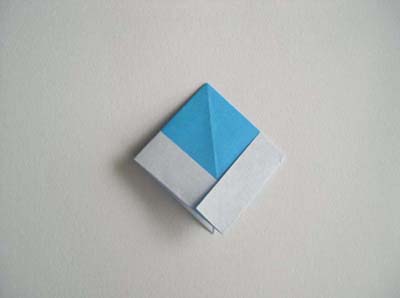
Now take one lower corner of the square and fold it upwards. Flip the piece over and do the same for the other corner.

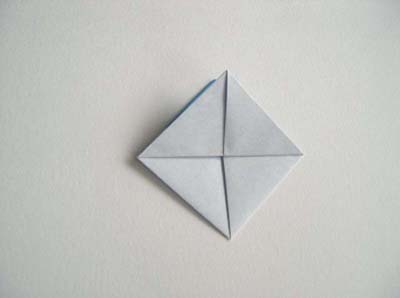
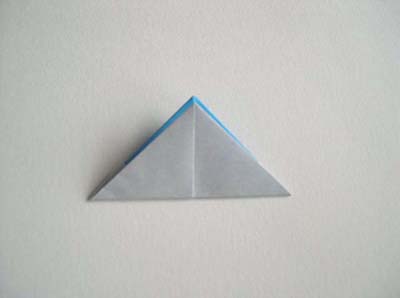
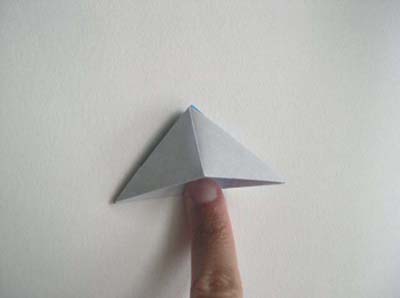
You now have a folded triangle. Open up the folded triangle, bring the corners together...

folding boat

still folding boat

boat and finger

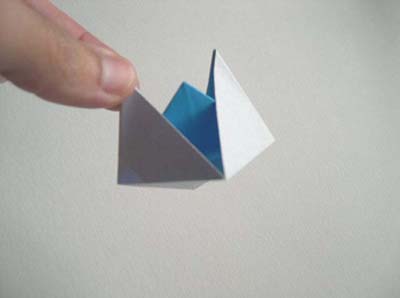
...again, "squash" the triangle into a square (below middle photo).

Now pull the outer corners of the square, one in each hand.

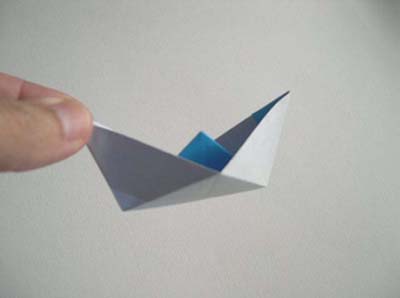
Keep pulling to unfold your boat.

We like to turn the boat over and expand the hole in the bottom. This will help it balance and float better.

origami-boat-folded square

boat folded

boat unfolding

still unfolding boat

boat unfolded

bottom of boat

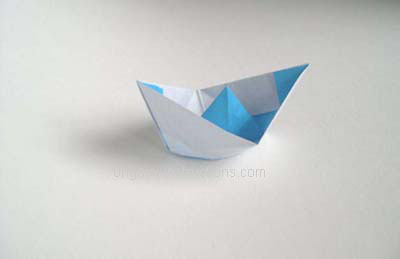
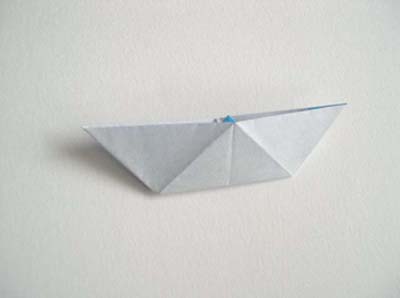
Now we just need some water to float our origami boat!

completed origami boat


Read more...
Origami flapping bird


Read more...
Saturday, March 7, 2009

Lounge-room coffee table

This project, as with other Buildeazy projects, is designed with the home handyman or DIYer in mind. Joints that might require the expertise of a more seasoned woodworker are non-existent. Instead, all joints are secured with bolts and/or screws and maybe a bit of glue. Because of this, the project only requires the most basic of tools to undertake a professional job, but does not lack in strength.
The Plans

coffe table plans
The Cutting List

Item Description Quantity and Length
a. Legs: 50mm x 50mm (2"x2") 4 @ 400mm (16")
b. Top rails: 100mm x 40mm (1 1/2" x 4") 2 @ 940mm (37") and 2 @ 400mm (16")
c. Table top: 20mm (3/4") board 1 @ 1200mm x 600mm (2ft x 4ft)
d. Corner supports: 100mm x 50mm (2"x4") 4 @ 150mm (6") long and angled in at 45degrees both ends.
e. Fillets: 25mm x 25mm (1"x1") 2 @ 150mm (6") and 2 @ 700mm (28")
f. Coach bolts: 6mm (1/4") thick 4 @ 150mm (6") and washers and wing-nuts to suite.
Screws Wood screws: 30 @ 40mm (1 1/2") long and 16 @ 60mm (2 1/2") long.

The Instructions
1 Cutting the members and a bit about the wood.
Cut all the members (pieces of wood) to the measurements as shown above. The lumber widths and thicknesses, are common sizes that can be obtained from most building suppliers or lumber stores.
Also, note that the widths and thickness sizes stated above are the sizes before the wood is dressed or gauged. For example: a piece of 100mm x 50mm (2x4) lumber might actually be 90mm x 45mm (1 1/2"x3 1/2").

The type of lumber is a personal choice but should be of a good grade. Are you going to paint the finished table? Maybe stain and varnish it? Take this into consideration when choosing the type of wood. For the table top, use a piece of 20mm (3/4") thick MDF (medium density fibre board), custom wood, plywood or similar type of board.

2 Fixing the top rails to the table top.
Place the table top (c) upside down on an even floor, saw stools or workbench. Position the top rails (b) on the underside of the table top so that they are touching at each corner and also centered on the table top, as shown in the diagram.
coffee table construction
Next, lay the 4 fillets (e) in place against the top rails (b) and the underside of the table top (c).
Screw through the fillets (e) into the table top (c) and then screw through the fillets (e) into the top rails (b). Sometimes it might be easier to pre-drill the screw holes through the fillets.

3 Fixing the corner supports to the top rails.
Lay the 4 corner supports (d) in place in the corners against the top rails (b) and fasten with screws; four to each corner.

coffee table corner piece
corner support
coffee table corner support

4 Chisel an edge off the top of each leg.
With a chisel, take the arris (sharp edge) off one side of each leg (a), beginning about 60mm (2 1/2") down from the top and continuing up to the top. Make the depth of the chisel cut about 10mm (3/8"). This is so the bolt-head will be against a flat area of wood rather than an arris.
coffee table legs

5 clamp coffee table leg Fix the legs to the top rails.
Clamp the legs to the top rails (b),and drill a hole all the way through each corner support (d) and leg (a). Make the holes slightly bigger than the thickness of the bolts. Insert the bolts and tighten.
bolt the coffee table leg

6 Final touches.
Finally paint, stain, varnish or oil the table.

coffee table
painted coffee table


Sourse: http://www.buildeazy.com

Read more...
Mini doll

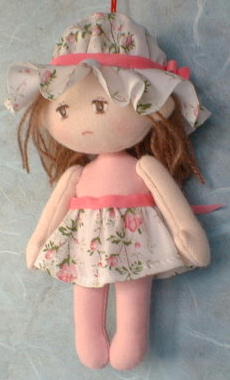
Example

You can make them easily using a little cloth.

Basic doll

Materials

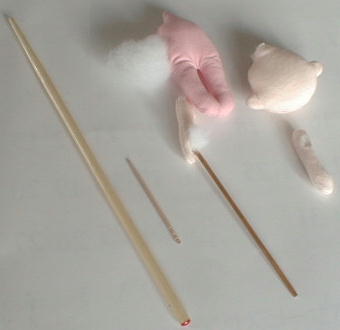
  • cotton jersey (face and arms)
  • cotton lawn (lining for the jersey fabric - any thin cloth)
  • cloth (dress and cap)
  • ribbon
  • wool yarn (hair)
  • polyester fiberfill
  • string to suspend

Tools

  • sewing machine, needles, thread, scissors, chalk and so on.
  • ruler, chopstick, pencil.
  • tacky glue (to stick hair).
  • paints or oily felt-tip pen (to paint face).
  • rouge.
  • toothpick.

Procedure

Making patterns

  • Print pattern out on A4 paper. It doesn't have to be precise.
  • There are several types of patterns. You choose any type you like.

Copy patterns on the cloth

  • Head and arms.
    Pin two sheets of jersey between two sheets of cotton lawn.
    Draw, using a pencil.
  • Body.
    It's made in one piece. Mark it with the chalk.

Patterning

Sewing

  • If not using a sewing machine, handsew with small stitches.
  • Sew the head and the body around, except at the openings.
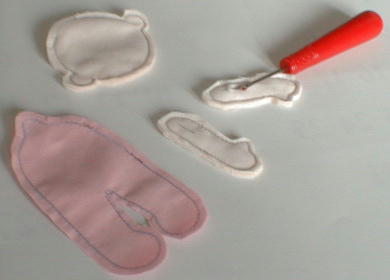
  • Sew all around the arms, opening a hole with a ripper on one side of each,
    making sure to have one right and one left arm.

Turn inside out

  • Cut out with scant 1/8th inch margin. Under the thigh, slit close to the seam.
  • Turn arms, using toothpick or other turning tool.

CuttingTurn

Stuffing with fiberfill

  • Fill lightly. Don't fill ears.
  • Fill the neck firmly.
  • Stitch the head and body openings.

Filling

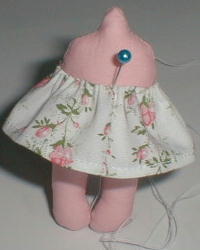
Put skirt on

  • Sew cloth (1.6" × 7") in a ring and stitch the hem.
  • Fold waistline a scant 1/4" to the inside, make gathers and stitch it to the body.
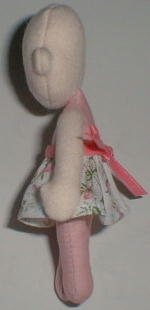
    Wrap a ribbon around the waist and tie it in a bow behind.

SkirtFace and hair

Painting features

  • Paint eyes and mouth, using color or pen.
  • Rouge the cheeks.

Positioning arms

  • Close the hole in each arm, and stitch it to the body,
    a little toward the front of the body.

ArmsTo put the head

Positioning head

  • Stitch the head to the neck, using large stitches through the filling.

Hair

  • Tie the center of the wool yarn, stitching it by hand.
  • Style hair and length to your liking. Glue hair on head.

Cap

  • Cut a 4-inch diameter circle of fabric.
  • Use a thin glue on the edge (to prevent fraying).
  • Gather 1 inch inside the edge.
  • Place it on doll's head and tack lightly to head.
  • Tie ribbon around the gathers.

Cap on

String tie/pin

  • Stitch a string on the top of the head, through the filling,
    or attach a safety pin or pin backing to the back of the doll.

Just complete!

If you are not good at painting faces...

  • Draw lightly with a pencil.
  • When the face was not as you wanted it to be, paint again on the back of the head.

Read more...
Sunday, March 1, 2009

Simply Turquoise Necklace


Turquoise is more popular than ever and the look of leather with a chunky pendant is also a look that seems to be around the neck of all kinds of celebrities. The look is simply and so is the technique. You can make this necklace and have it around your neck in just a few minutes.

You'll need the following:

18 inches of 1mm leather cord
1 sterling hook and eye clasp
1 - 2 inch sterling head pin
2 - 4mm daisy spacer beads
1 imitation coral teardrop bead
1 large oval turquoise bead
round-nosed pliers
flat-nosed pliers
scissors

1. Begin by creating the pendant for your necklace. Slip on one daisy bead, your turquoise bead, another daisy bead, and your imitation coral teardrop (point down) onto the head pin.

2. Then use round-nosed pliers and flat-nosed pliers to create a wrapped loop at the top of the head pin.


3. Now slide your pendant onto your leather cord.

4. Create a loop on both ends of your leather cord using an overhand knot, and trim off excess leather if its long.

5. Finish by attaching the hook and eye pieces onto the loops on both ends of the cord.

That's it! Time to wear it and look just as chic as any Hollywood star.


Read more...
Floating Flower Necklace

You'll need:

2 sapphire colored AB Czech teardrop crystal beads
2 light blue AB Czech 4mm crystal beads
2 light blue 4mm freshwater pearls
1 flower lampwork bead made by D.D. Hess
2 sterling crimp beads
18 inches of blue Beadalon beading wire size .015
approx. 5 inches of sapphire Colour Craft ™ 20 gauge wire
nylon pliers
round nosed pliers
wire cutters
crimping pliers

1. First, start by making a clasp using the same instructions for my Clover Clasp project and some sapphire colored 20 gauge wire. I think this claps also looks like a flower, so I thought it was a good choice to accent the flowers on the lampwork bead. One tip to remember with any colored wire, try to handle it with metal tools as little as possible. It is coated, and if handled too much, you can dent/mark it up. Nylon pliers are great when working with this type of wire. Once you finish the clasp, set it aside.


2. Now cut about 18 inches of beading wire. I use my wire cutters to cut the beading wire.


3. Slip on a crimp bead onto one end of the wire, and loop the wire back through the crimp bead.

4. Use crimping pliers to crimp the bead and thus hold the bead in place. If you’ve never used crimping pliers, refer to my Using Crimping Pliers instructions. W. Scott Bartky also has a wonderful animated demo on his site.

5. Once you get one end crimped, use wire cutters to cut off excess beading wire.

6. Now slip on your beads in the following order: teardrop, pearl, 4mm crystal, lampwork bead, 4mm crystal, pearl, teardrop. Make sure that the teardrops have the smaller ends pointing in towards the lampwork bead.


7. Finish the other end of the beading wire with a crimp bead as you did in steps 3 to 5.

8. Now, get the clasp you made previously.

9. Open the eye part of the clasp a little and slip the loop on one end of the necklace onto the clasp, and close the clasp back up.

10. Tread the loop of the other end of the necklace through the clover/flower of the hook side of the clasp. 11. Once you get it resting in the center loop of the clover/flower, use nylon pliers to flatten or press the clover/flower. This will help to keep your beading wire loop inside the clover/flower.


This small grouping of beads in this necklace float because they are not anchored into position. They will slide and move as the person who wears the necklace moves. I used blue beads, beading wire, and craft wire to create this necklace in order to accent the gorgeous lampwork bead. I wanted the lampwork bead to stand out and be the focal point of the necklace. With all the choices in colored wire and beading wire, you could use this technique with any of your favorite lampwork beads that you’ve been hoarding.
Read more...