• Home
  • Tags
  • RSS
  • ME!
  • Edit

Wednesday, July 28, 2010

The Crown Napkin Fold


Do you want your dinner guests to feel like royalty but have no red carpet? Treat them like kings and give them all crowns! Then you can use this napkin to wipe the cheese out of that introduction.

This napkin folding design just doesn't work well without a little starch in the cloth, if it's sagging it's ugly so take your time and get it right.


Napkin Fold #1
1. Lay the napkin face-down in front of you.
Napkin Fold #2
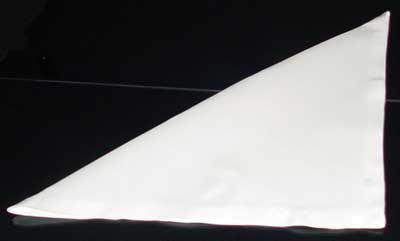
2. Fold the napkin in half diagonally.
Napkin Fold #3
3. Orient the napkin so the open ends are pointing away from you.
Napkin Fold #4
4. Fold the right-corner up so that the point rests directly on top of the middle-corner. The edge of this new flap should lay on the center line of the napkin.
Napkin Fold #5
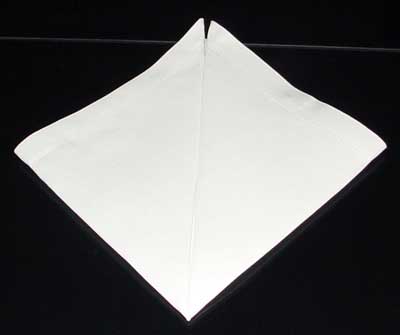
5. Repeat step four on the other side, bringing the left-most corner up to meet the middle-corner, creating a diamond shape.
Napkin Fold #6
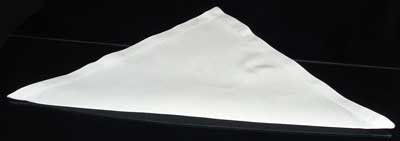
6. Fold the bottom of the napkin up about 2/4's of the way and press this fold down well.
Napkin Fold #7
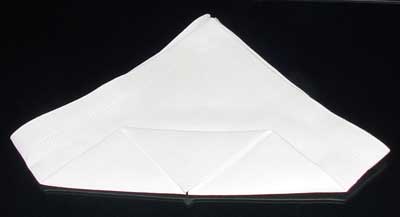
7. Fold the smaller triangle down so the point rests on the near edge of the napkin. Press.
Napkin Fold #8
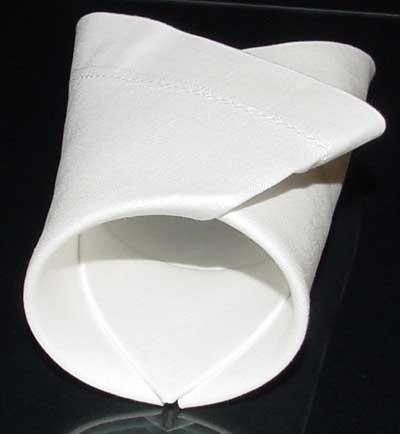
8. curl the left and right sides of the napkin up so they meet in the middle and tuck one into the other.
Folded Napkin
9. Stand it up and tug at it where needed to even it up and round it out. If your napkins are too limp then think of starch as napkin viagra and make them good and stiff.


Read more...

Tuesday, July 27, 2010

Hand made gum paste roses using no cutter


How to make quick & easy GUM PASTE & FONDANT ROSES USING NO CUTTERS OR MODELLING TOOLS .....New sugarcraft modelling ideas


Read more...

How to Make a Paper Bag - 10 steps


This bag can be made in any size, out of any type of heavy paper. Use it to hold candy, popcorn or any small objects or gifts.


Cut a piece of heavy brown or white paper (craft paper or butcher paper) to 9 1/2 inches by 15 inches.

Step 2

Position the paper on a flat work surface (any patterned or decorated side should be facing down) so that the short edges are to your left and right. Fold the bottom edge up 2 inches and sharply crease the fold. Unfold.

Step 3

Use a ruler to find the center points of the top and bottom edges. Make two small pencil marks at the top edge of the paper, 1/2 inch to the left and 1/2 inch to the right of the center point. Repeat on the bottom edge. Turn the paper over and make the same marks on this side as well.

Step 4

Bring the right edge toward the center of the paper so that it lines up with the marks made to the left of the center point. Sharply crease the resulting right fold. Unfold the flap.

Step 5

Repeat step 4 for the left edge. Make sure that the left edge lines up with the marks made to the right of the center point. Turn the paper over.

Step 6

Bring the left and right edges to the same points as you did in steps 4 and 5. This time, however, glue the entire left edge to the right edge at the point where the edges overlap by an inch. Do not crease the edges. Allow the glue to dry thoroughly.

Step 7

Place the seamed side of the bag down. Push the left and right creases in about 1 1/2 inches so that they fold in toward the center. Lay the bag flat and crease the sides of the bag so that the folds are each sandwiched between the front and back of the bag.

Step 8

Locate the line of the crease made in step 2. This is the bottom of the bag. Fold the bottom edge of the bag up 4 inches and sharply crease. When you release the paper, the bottom edge of the bag should be slightly erect.

Step 9

Open up the bottom edges of the bag so that an upright, open-ended box is formed. The box should open up along the fold lines made in step 2 and this fold line should be touching the bag's surface. If you look down into the box, you should see two paper triangles facing each other.

Step 10

Push the side creases of the box inward and bring either free edge of the box down to lie flat. Bring the remaining free edge down on top of the other and glue it into place. Allow the glue to dry thoroughly and open the bag.


Read more...