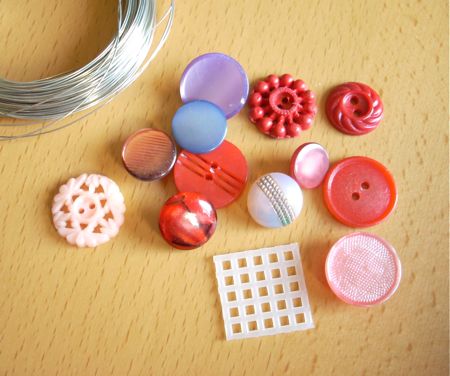
So, you begin with some small pieces of plastic canvas. The 10-count variety is best - the more-commonly available stuff with the larger holes. Start with a piece that’s roughly the size you want your finished pendant to be, plus a little larger. This is a very flexible project, so you can always cut away excess canvas, or even add more later.
Next, gather some cool buttons. You’ll want a mix of sew-through and shank buttons. And you’ll also need some coated copper craft wire in either 24-gauge or 28-gauge. I like 24 myself, but if that seems to stiff to handle, try some 28. You can use any color of wire, by the way.
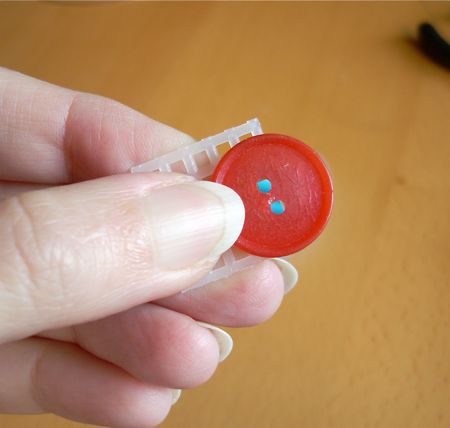
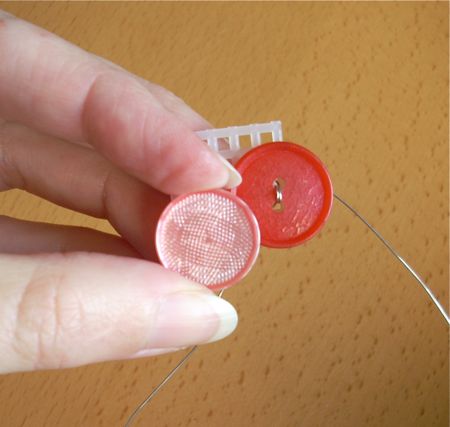
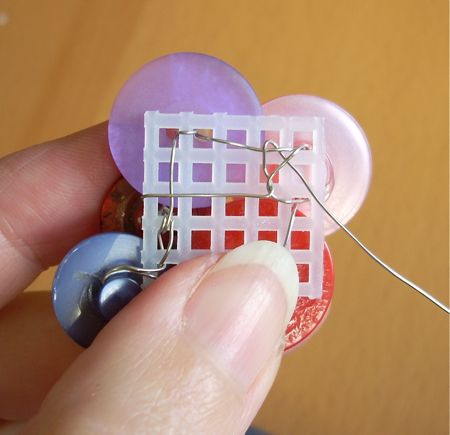
Okay, new we’re going to wire these buttons to the plastic canvas. Begin with one of your sew-through buttons. Position it on the canvas and move it slightly until you’ve lined up the holes in the button with the holes in the canvas. (You’re looking at the blue handles of my scissors through the holes here.)
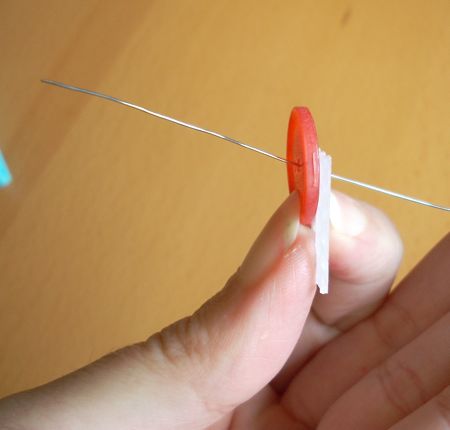
Take about an arm’s-length piece of wire. Thread one end through the first set of holes, passing through the button and the canvas. Pull the wire through until there’s about a 6″ tail of wire sticking out from the back of the canvas.
Poke the leading end of the wire back down through the other set of holes - again, passing through both the button and the canvas. Carefully pull the wire through until you have just a little stitch or wire on top of the button. (If your button is a four-hole button, then take another stitch with the wire through those holes, too.)

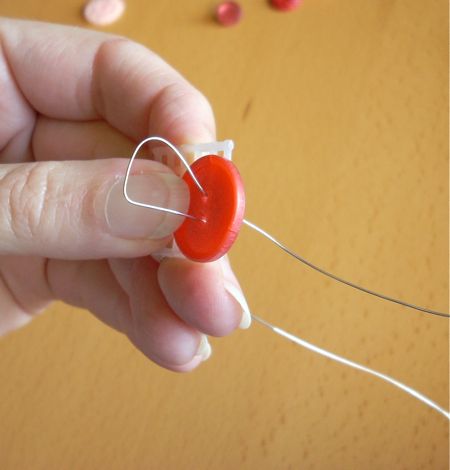
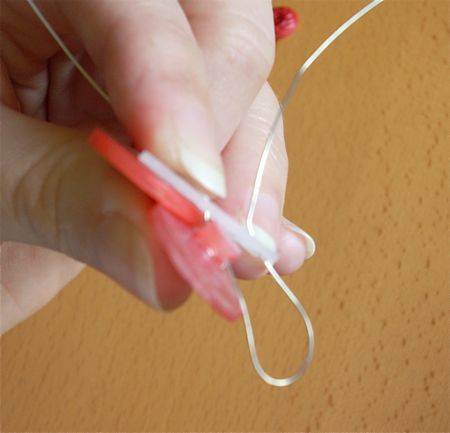
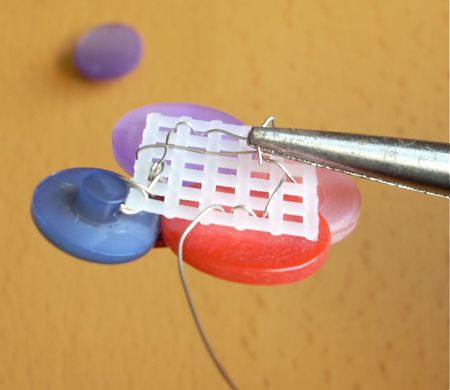
Now, here’s something to watch out for as you pull your wire through the canvas: it will want to twist up, like this. Take lots of care to avoid these twists! If you pull twisted wire too much, it will kink, and kinked wire can easily break. So, any time your wire begins twisting, stop a moment and un-twist it before you continue pulling.
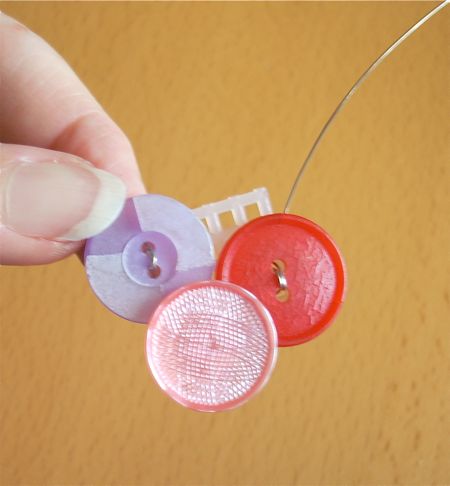
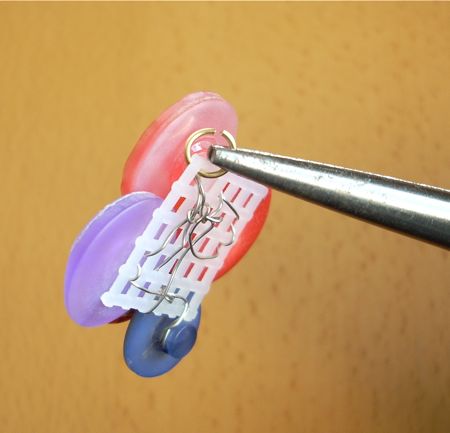
Let’s add a shank button to our pendant now. Shanks are great, because they can overlap the sew-through buttons and give your pendant some nice dimension.

Place your shank button where you like it on the pendant, and then look at it from the side, like this. Make sure the hole in the shank is in a location you can easily reach. (If it’s not, just spin the button around.) And then, guide the leading end of the wire up through the canvas so that it’s close to where this hole is.

Now that you have the wire positioned, you can thread the button onto it. Scoot it down the wire until it’s back in place on the pendant.
. . . And then pass the wire back down through the canvas, and pull it tight. Apologies for the focus here.
This is a good time to mention: for sew-through buttons, I’ve found that one set of wire stitching is plenty to hold it to the canvas. For shank buttons, I like to stitch them twice, so they don’t flop around.
If you’re using vintage buttons that have wire shanks, these will always have a tendency to flop. You may have to anchor them with a little glue later on.
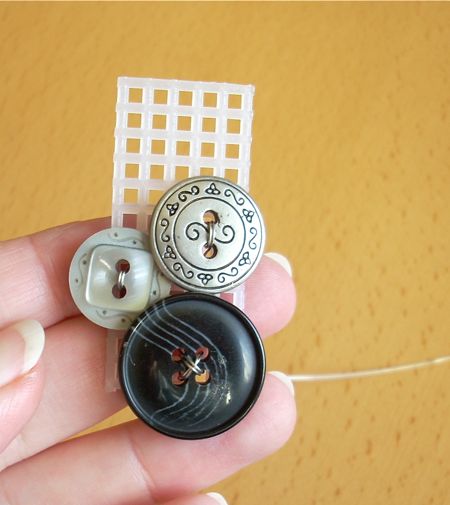
Keep wiring buttons to your pendant. You can really get creative, stacking buttons on top of each other, and you can of course add beads and other embellishments.
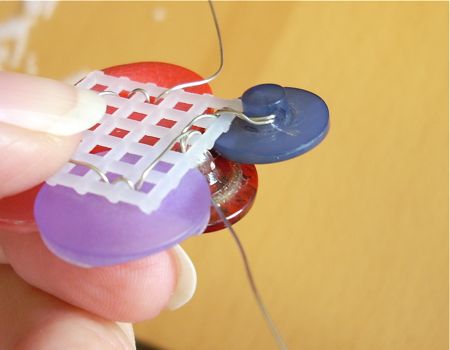
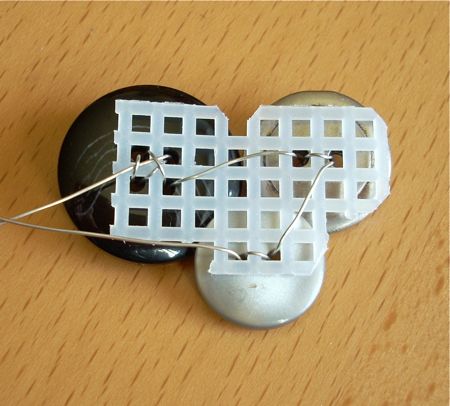
You can even wire a button to the outside edge of your canvas, as seen here. Or, if you decide to make your pendant larger, you can cut a second piece of canvas and wire it to the back of the first one.
When you’re done wiring on buttons, flip your pendant over. You’ll have all these stitches on the back. Finish off the two loose ends of your wire by weaving them under a few of these stitches.
Cut the end very short, like 1/4″ or less, and then use some needle-nose pliers to bend that end down into the canvas, so it won’t stick you when you wear your pendant. Finish off both loose ends this way.
Install a large jump ring through the canvas, and you’re all set. String this bad-boy on something and wear it!
By the way, sometimes you’ll end up with excess canvas sticking out from under the buttons. No worries - you can simply cut this away with scissors.
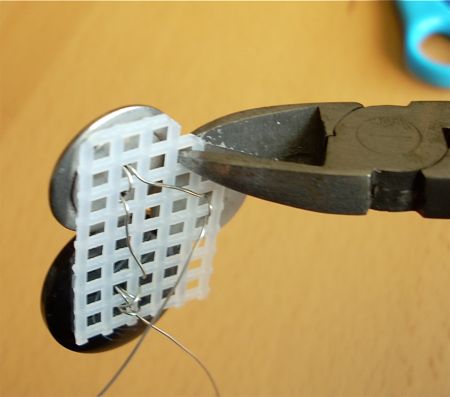
. . . And your wire-cutters can help you reach into tighter spots.
See? Custom-shaped backing. You can also cover this back with felt, if you’re so inclined.


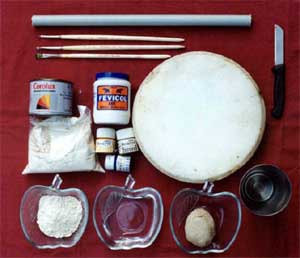 What you need:
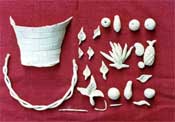
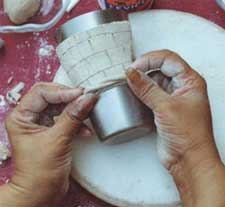
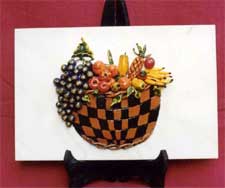
 basket take a portion of dough and flatten it and cut it out in the shape shown in the picture, place it over a glass as shown in the picture. Few horizontal lines and in between few vertical lines are pressed over the dough to get the exterior of the basket. Two small strings should be made with the dough and it should be twisted or plaited neatly and pasted to the top and bottom of the basket.
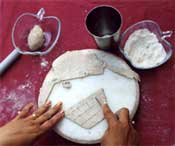
 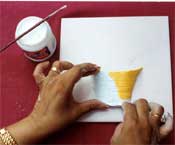 three sides of your basket on the tile. The top portion should be kept open. Fill the basket with clay dough to the brim.
 Keep this
  with my instructions page where you can learn how to coil the paper strips and make the basic shapes.
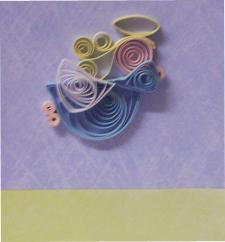 This little quilled angel fits on a small card or gift tag. I used a white card with green and blue paper stuck onto the front.
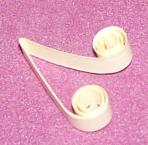 For the first section of her hair we will use a quarter length strip of lemon folded in half. Coil one end towards the middle until you have about 1/2 inch left before the fold. Do the same with the other end making sure that both coils are going in the same direction. The photograph will show this better than words can.