• Home
  • Tags
  • RSS
  • ME!
  • Edit

Sunday, May 3, 2009

Scary Mouth Pop-up Card for Mothers Day

Make a Mouth Pop-up Card. When you open the card, the mouth opens! You can make your card look like a bird, a shark, or a big-mouth monster. This is a very easy project and a lot of fun.

Things Needed

  • 2 pieces of paper (colored card-stock works great)
  • Scissors
  • Paste
  • Crayons and/or markers
Method

1. Fold a piece of paper in half. Cut a line about 2 inches long (5 cm) about the middle of the crease.

2. Fold back each of the flaps to make 2 triangles.

3. Open up the card.

4. Lay it down like a V.

5. Push one of the triangles up and pinch the edges together above the card.

6. Repeat with the other triangle.

7. Close the card and push down on the folds to make them well-creased.

8. When opened, you have a pop-up mouth.

9. Fold another piece of paper in half (a different color looks great).

10. Glue this new card to the outside of your pop-up card. Don't glue near the mouth area or it won't open! Let the glue dry.

11. Draw a scary animal around the mouth and finish decorating your card.

12. For variations on this card, don't cut a straight line - cut a wavy line or a zigzag for scary teeth. You can even make more than one mouth for 2 monsters or a two-headed monster. This pop-up area also looks a lot like a bird's beak or a shark's mouth.


Read more...

Butterfly Card for Mother's Day

A colorful butterfly card made from construction paper. This card is great for birthdays, Mother's Day, or other occasions.

Things Needed
  • Construction paper
  • Hole punch
  • Scissors
  • Glue stick
  • Pencil
  • Markers or crayons
  • Optional: Glitter glue or glitter
Method

1. Fold two pieces of construction paper in half, making two card shapes.

2. Put the two folded cards together (one inside the other).

3. Along the fold of one of them, draw half a butterfly.

4. Keeping the two cards together, cut along the line you just drew. You will now have two butterflies.

5. On only one of the butterflies, fold it in half again and draw a smaller butterfly within it.

6. Cut along the line you just drew.

7. Using the hole punch, make a series of holes along the edges of the two pieces you just cut.

8. Glue one of these pieces onto the larger, uncut butterfly.

9. Flip the large butterfly over, and glue on the other cut piece.

10. Cut a black or brown body for your butterfly. Glue it onto the inside of your butterfly.

11. You now have a nice butterfly card. Write a message on your card.

12. Optional: Decorate your butterfly with crayons, markers, glitter glue, or glitter.


Read more...

Paper Flower

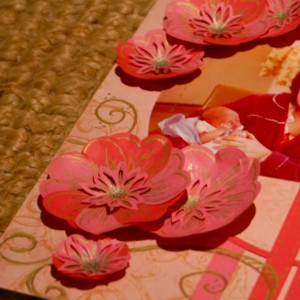
Some paper flowers on a scrapbook page layout

There are so many lovely ways to do this. One way is to use your heart punches. You can make flat flowers or 3-d ones very easily. Let me show you how!

To make flat flowers, you will need:

  • A heart punch – use several different sizes of heart punchess if you want to make a few different sized flowers

  • Some cardstock or designer patterned paper

  • Some adhesive such as a glue pen or a double sided tape runner

  • Perhaps a circle punch for the centre, or you could use a brad, another shaped punch, or anything else that you think would make the centre of the flowers pretty

  • Scissors with a sharp point are often very useful, but sometimes not really necessary – the punch can do all of the cutting for you

  • Pens or paints or other markers for adding a little depth to your blossoms with a few lines or accents. I use a lot of metallic pens for this, like gold, copper or silver or even all three with a little black to add more depth


Tools for making paper flowers from heart punches


Here’s How to Make Paper Flowers like the ones in my illustration above, only flat:


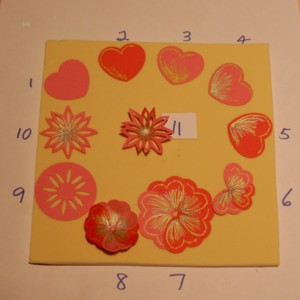
The steps to making a paper flower with punched heart shapes


  • Step 1 - decide what size heart punch you want to use. It will be forming the petals. Punch out about seven hearts. You may need more or less, depending on the punch size and how much you want to overlap the hearts

  • Steps 2 to 5 - Now use your markers or pens to make the centres seem more like blooms. I colour the point of my hearts as they will form the centres of the blossoms. I also run a little edge over the outside of the heart as shown in steps two and three

  • Step 6 to 7 – Assemble your hearts together as shown, continuing until you have enough to make a flower. Put some adhesive behind each petal so it will stick to the last one. When you reach the last petal, slip it under the first and adhere it down

  • Step 8 – Shape your flower with the shaping tool (this process is described below)

  • Step 9 – punch out the centre of your flower. I used two punches here, a flower punch and a circle punch. If you use a flower punch like this where the petals are a silhouette, punch the flower first then punch out around it with your circle punch. If you try it the other way round, the circle will slip around in the flower punch and it be hard to get an even border

  • Step 10 – With this centre decoration, I added accents to it with gold, silver and black pens then trimmed around the image with my sharp little scissors

  • Step 11 – The shaped centre


For one finished effect, you can now use the flat shapes as they are. Just place the centre piece in the middle and glue it down. This is great for scrapbook albums where you don’t want too much bulk.


Read more...

Clay Molding

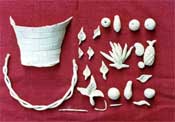
We see a lot of beautiful things around us. With little creativity and effort we can make wonderful things with clay. By using the following method and materials we can make a clay basket and different types of fruits, well arranged in the basket.

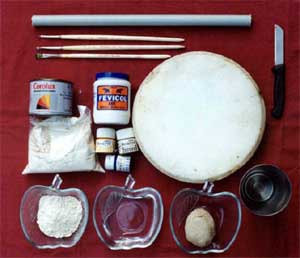
What you need:

  1. China clay - 1/2 kg (approx.)
  2. Ceramic Powder- 1/2kg(approx)
  3. Ceramic Tile - 1 piece (12x8 or 12x12 size)
  4. Fabric Paint -Different Colours
  5. Varnish -1 bottle
  6. Glue.

Tools / Accessories:

  1. Brushes
  2. Roller
  3. Knife

How to Mould:

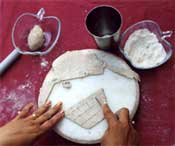
  1. Mix together China clay, ceramic powder and glue. Make it into a dough.
  2. Take small quantity of this dough and roll them into balls of various sizes to make grapes. Make 40-50 of them and paint purple.
  3. Same way shape up apples, bananas, oranges and whatever fruits you want to make, colour them and once the colour dries up, varnish them.
  4. To make leaves, take small quantity of the dough and roll it using the roller. Cut it in the shapes of leaves (various shapes) and paint them green when dry, varnish them.
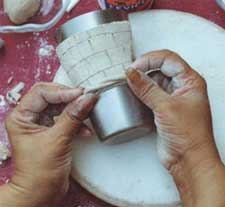
  5. To make a basket take a portion of dough and flatten it and cut it out in the shape shown in the picture, place it over a glass as shown in the picture. Few horizontal lines and in between few vertical lines are pressed over the dough to get the exterior of the basket. Two small strings should be made with the dough and it should be twisted or plaited neatly and pasted to the top and bottom of the basket.
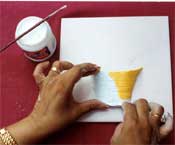
  6. Now paint the basket with brown and black colours and varnish it.

Finishing Touches:

Take a Ceramic plate. Wash it and let it dry. First using glue, stick the three sides of your basket on the tile. The top portion should be kept open. Fill the basket with clay dough to the brim.
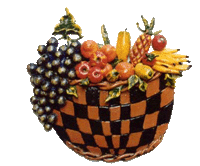
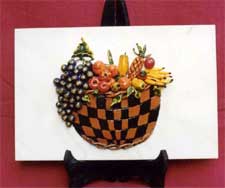
Now arrange the fruits on the top portion of the basket. Stick them in a beautiful way. If a small piece of magnet is stuck at the back of each fruit it can be put up can separately on any metal piece. This can even decorate our refrigerators.

Keep this fruit basket on a wooden stand. It will add decor to your dining or kitchen or even living room.

It can also be gifted to someone you love.

Try it and come out with beautiful creations. Enjoy yourself.


Read more...