


Things Needed
- 2 pieces of paper (colored card-stock works great)
- Scissors
- Paste
- Crayons and/or markers
1. Fold a piece of paper in half. Cut a line about 2 inches long (5 cm) about the middle of the crease.
2. Fold back each of the flaps to make 2 triangles.
3. Open up the card.
4. Lay it down like a V.
5. Push one of the triangles up and pinch the edges together above the card.
6. Repeat with the other triangle.
7. Close the card and push down on the folds to make them well-creased.
8. When opened, you have a pop-up mouth.
9. Fold another piece of paper in half (a different color looks great).
10. Glue this new card to the outside of your pop-up card. Don't glue near the mouth area or it won't open! Let the glue dry.
11. Draw a scary animal around the mouth and finish decorating your card.
12. For variations on this card, don't cut a straight line - cut a wavy line or a zigzag for scary teeth. You can even make more than one mouth for 2 monsters or a two-headed monster. This pop-up area also looks a lot like a bird's beak or a shark's mouth.
Read more...

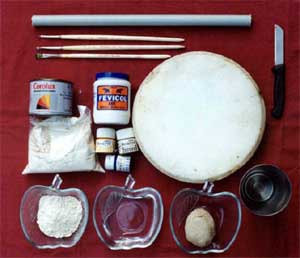 What you need:
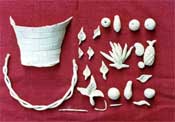
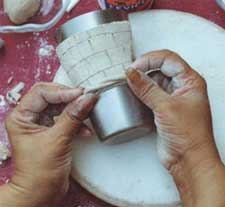
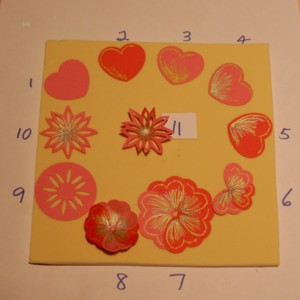
 basket take a portion of dough and flatten it and cut it out in the shape shown in the picture, place it over a glass as shown in the picture. Few horizontal lines and in between few vertical lines are pressed over the dough to get the exterior of the basket. Two small strings should be made with the dough and it should be twisted or plaited neatly and pasted to the top and bottom of the basket.
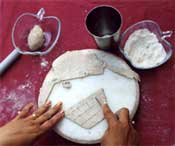
  three sides of your basket on the tile. The top portion should be kept open. Fill the basket with clay dough to the brim.
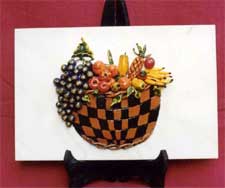 Keep this


