• Home
  • Tags
  • RSS
  • ME!
  • Edit

Wednesday, June 8, 2011

Another way to make a baby changing mat


To wear your baby anywhere if you want to change the diaper changing mat provides a clean surface. Quick and easy pillow diapers can make Matt baby. Or can any fabric to sew a selection of custom carpet. Select to create a flannel back table cross-vinyl carpet clean wipes, or comfortable cotton fabrics to select, and then if necessary, wash your mat machine. Make some to keep the bag or car in hand House, changing mat. You can provide a mat evolution as baby shower gifts.


Modify the custom sewn mats.

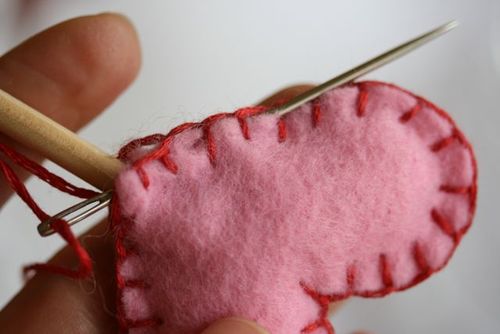
Stick with two fabrics per each 30 inch to 15-inch cut. The deburring, as required.

The batter throws flour to a flat surface. Place a small piece of tissue to rest on the first part of the fabric cloth and the top of the right stick.

Near the end pin carpets around deploys all three layers.

On the long side to sewing the three layers, and then start together 1 / 2 inch edge removed from the PIN, comes to them. Through open three or four the translation out carpet of evolution “.

Organization and change mat layer between right through. Hides the stitches near the limit could close the fabric inside opening and closing open more carefully.

Run time up to around 1 / 2 inch from the edge of the transfer pad. Sew the other changes in the bi-directional pad to form a large corner site for x. Change the movement free quilt surface Matt.

Mutation or mat of storage or transport roles.

Change cover matte

Cut into sticks pillow-sized.

Drag the end of the stick pillow fine and smooth openings carefully. Near the edge of the boundary of pillows to PIN through all three layers. Depending on the distance pillow last open to trim the stick held fast to the.

Sew around the edge 1 / 2 inch completely, deleting only the PIN cover.

Sew along one inch from the edge of cover equal to the end.

Forming elsewhere in bars for large x in the bi-directional square pillow to sew. Change the movement free quilt surface Matt.

Mutation or mat of storage or transport roles.

Read more...

Sunday, June 5, 2011

How to Make a Baby Changing Mat

This article will show you how to make a baby changing mat!


1-Get yourself a meter (1m x 0.7m) of water resistant fabric, any color you like. Half a meter of thick wadding (0.9 x 0.6), some thread and you're ready to go.
2-Place the wadding on top of the fabric and fold the fabric over so you have three sides ready to stitch with one folded side. Ensure you have about 1 inch of free fabric on each side, cut down if necessary.
3-Remove the wadding and fold the fabric back over so the water resistant surface is inside. Sew along the 2 longest sides.
4-Turn the fabric back inside out so the water resistant side is now on the outside. Stuff the wadding in to create a smooth, bouncy surface.
5-With the unstitched side, pull tightly to make sure the wadding fits snug inside and sew along the seam.
6-For added effect, stitch about 2 inches in from each side to create the centre where your baby can lay down comfortably.


Read more...

Thursday, June 2, 2011

How to make love


In this instructable, new ways to make love are explored. You can make love for valentine's day. Several examples with explicit pictures are given. Enjoy!


Step 1: To make lots of love we need a pattern


The pattern for love is cut from cardstock with scissors. Just go into the word processor and pick a font, select size, outline, print and cut.
Step 2: First way to make love is with plain cardboard.


I cut these out on the bandsaw. Use the letter pattern of love to outline letters, then cut.

Step 3: Make plain love


Letters made out of styrofoam, cut on hotwire machine.

Step 4: Make your love stand out


If Love is painted in the color of your choice, it will be more enduring, and look better, too. I chose red here.

Step 5: Make Love standing up


In this shot, love is made in the upright position. This is not really practical, but is an option.

Step 6: There can be contrast in making love


Here, cardboard is shown against a white background. Quite a contrast in love.

Step 7: Bugs and bees in love!


Self explanatory....

That's how you make love :). Enjoy!


Read more...

Tuesday, May 31, 2011

A cool hand-made tool organizer


Need a simple, easy to make tool organizer? I had the thought that it would be better to have a vertical tool organizer instead of having the tools lie all over the work area. Using styrofoam and cardboard, an effective tool holder is made.

Step 1: Gather Materials


For this simple project, you will need cardboard, styrofoam (EPS foam, actually) a craft knife or box cutter, a hotwire machine if possible, some glue and a rubber band

Step 2: Prepare Foam Blanks for Cutting


Here, a piece of foam is selected to be the holder for the pair of pliers shown. With a pencil or sharpie, trace silhouette onto the foam.

Step 3: Cut Out All Tool Holders From Foam


In this step, all pieces are cut with the hotwire machine. A craft knife can be used also, you are just limited in thickness of foam. Use many strokes to cut with a knife, taking care not to tear foam.

Step 4: Glue foam to cardboard


For each tool piece, cut and glue appropriate foam piece to the pre-cut cardboard. For this project, I had four tools to organize, hence four pieces of foam and four pieces of cardboard.

Step 5: Complete Pieces for each tool.

The four tools in this project and their foam pieces cut and glued to cardboard.

Step 6: Complete Project


The final product...Note how footprint of holder is about equal to the space one tool occupies. This way you can tell at a glance if all tools are in place, and they are easily grasped for doing your work. I used a rubber band to hold the modules together, but they can be enclosed in a "box" made of cardboard, masonite, matboard, or so on. I left it at this point as I might want to add to it in the future, but don't want to make it too big.
Step 7: Tool Organizer Makeover

I decided to update, improve and decorate my tool holder....time on my hands!

Read more...

Saturday, February 12, 2011

Valentine Sucker Tutorial


First, collect your supplies:

(everything can be found at Michaels, of course!)

~cut 2 heart shapes out of felt
~embroidery floss
~oversized needle (these work better than regular handsewing needles)
~wooden stick
~polyester filling
~hot glue gun
~Valentine ribbon
~plastic sucker bag (optional)


Beginning close to the point of the heart, blanket stitch the two hearts together. (Leave a gap at the point that is large enough to place the wooden stick in)


Leave yourself enough room (about 1") to stuff polyester filling inside the heart.


Using your hot glue gun, glue a small amount of glue on the end of the wooden stick.


Place stick 1/2" inside the heart, making sure you do not glue the "points" of the hearts.


Finish stitching around the heart. (When stitching the point, you will stitch one side of the heart at a time)


As shown in the Cookie Tutorial, work the needle back and forth a few times to hide the leftover thread.


Read more...